Monday, February 27, 2012

Connecting the Brain


So I have finally decided to work on showing you the first steps in building your own PC. I selected major components before entering the store and then was "assisted" by the sales person to make sure I didn't have compatibility issues. (I say assisted because I went into the store originally to ONLY get the video card, and I walked out with everything for the entire computer. Some things could be better had I slowed down and considered the pro's and con's) Now I had a PC to put together; I also kept my budget under $500 not including the mail in rebates that I got. Since I started with a lengthy post on the brain of the computer, that is where I started with the build.

I was going to use a Phenom processor originally, however when I arrived the store was having a bundle deal on the newer "FX" processors with a Free Mother Board. I wasn't going to spend a lot on an amazing mother board (ASUS Crosshair V Formula Socket AM3+ 990FX, for example) so I was happy that I would be able to get the board at little to no cost. So the processor that I purchased is the: AMD FX-4100 Black Edition; The Mother Board is: ASUS M5A78L-M LX PLS AM3+ 760G.

Before starting I also wanted to set up my work area so I didn't have any issues with space or cleanliness.


Now I was ready to start putting the pieces together. Starting with placing the processor on the mother board along with the CPU heat sink (the cooling block that keeps the processor chips heat down). I thought that this process would be slightly more complicated then it actually turned out to be and in reality I made it more difficult the first time around.

Here is the mother board out of box and package, along with a close up of the processor in the socket before installing the heat sink.


Installing the heat sink at this point is very easy and the one that came with the CPU actually had thermal material already on it. I cleaned it off to use "better" thermal paste, looking back it was absolutely unnecessary. (Those individuals who have used thermal paste in the past can criticize the application all you want; however there is no evidence that one method of application yields better results than another. Thermal paste is designed to fill in minute spaces between the heat sink and the processor creating a more complete seal between the two to allow for greater heat displacement. That being said too much thermal paste is a bad thing since it could ultimately insulate the processor and have the opposite effect that it was designed for.) I had to redo the installation of the heat sink after I used too much thermal paste the first time, for this reason I should have just used the heat sink out of the box that already had a pre-spread amount of thermal compound on it.
 There are two clips on the side of the heat sink that firmly connect it to the mother board that are connected to the harness (the black plastic thing surrounding the processor). Once connected to the motherboard you need to find where the CPU fan connects and plug it in to the correct end and VOILA. That's how complicated the process is.
The Finished Product of the Installation of The CPU and Heat Sink
Next we will look at installing the power supply and the mother board to the computer case.

Things to consider: a new mother board will have documentation in the box that details how to install the processor, its very important to have this on hand, as well as looking over the specifications again before attempting installation. If the socket on the mother board does not match the pins on the processor you could damage the mother board, the processor or both. Check and re-check before connecting components should ensure that you don't wast time and money having to replace what was broken by trying to rush through the process.


I would like to hear from my audience what there thoughts are. What challenges have you had in following this build? Where can I clarify the process more fully?

Monday, February 13, 2012

Busy and Lazy

I have now upgraded my bosses computer ($220) as well as built my PC under my budget of $500. More to follow I just have not had the time to put together a real update. At least one that doesn't feel half assed.

For now here is a preview of the system:
The Goods

Wednesday, February 1, 2012

Not a lot has happened...

Okay, since my last update I have done nothing to move forward. I have been issued am upgrade challenge that I am going to follow in the mean time. My boss wants to upgrade the Processor of his desktop and wants me to do it. He wants to get more power but doesn't want to spend more then $200. I still have yet to get the PC so I don't have a great idea what I am working with. That being said as soon as I do have it I will be following up with posts on the project. I would greatly appreciate any feed-back or suggestions during the course of the upgrade, as well as during my build. Let you know soon.

Friday, January 27, 2012

The Brains

To get started we need to come up with a rough list of things that we are going to need. You are able to use the internet to assist you here with a simple search using Google or similar search engine, you should be able to come up with at least a basic list of parts that are necessary. I searched, "list of necessary computer components" and one of the results at the top looked promising: Desktop PC Parts Checklist In the article you can find the basic parts that make up a PC along with a brief description with regards to what they do. Okay from here I just have to take into consideration what type of machine I wanted to build (see previous post) and begin researching what parts specifically will I need along the way. (note: going straight down the list and finding parts at random because they are cheap or look cool or sound good is the reason that research is necessary as well as we need to be concerned with what our major cost items are.) Since I want to dive right in and get started I looked again what characteristics I am looking to get from my PC.  Powerful and reliable with the freedom to upgrade as the technology improves.

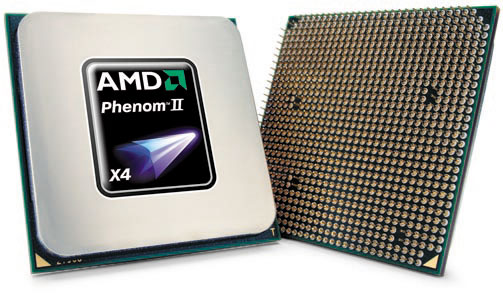
So I am starting with POWER! yeah I just did that. What makes a computer "powerful'? If you break down a computer simply put it is just a machine that is doing a lot of math very as quickly as it can. Right I probably want something along the lines of having Albert Einstein  or the very least his brain at my side. (If you are wondering why I say that a computer is just a machine doing a bunch of math you need to know that computer programs are essentially a bunch of "0's" and "1's" in sequence and the computer uses math to translate them into what we understand as programs.) So going back to the helpful website we looked at for a list of basic parts if we can look at the processor since it is defined as the brain of the computer system. Okay so I want a powerful processor. This is where you will see computers defined as having an "Intel® Core™ i7" etc... There are two dominant brands that manufacture processors, Intel and AMD, these are not the only ones (IBM, Motorola, etc...) but they are the two I will be focusing on. The more popular is Intel; however AMD (Advanced Micro Devices) is gaining popularity as its processors become more powerful and more reliable. Defining the speed of a processor gets fairly complex (I found a great guide if you really want to know here: Central Processing Unit) and goes back to focusing on what you want to use your PC for so I will not go into it here. Processors are most often marketed by their operating frequency measured in GHz (gigahertz) and the usually the higher the better, but not always. AMD generally tends to be more affordable then Intel since they are somewhat of the underdog with Intel's processors out performing AMD's (not by much) in stress test's, therefore I decided to go with an AMD processor. Specifically: AMD Phenom II X4 960T Black Edition this should prove to be a powerful (3GHz) processor that is also reliable and should upgrade easily. With a price tag of just over $100 this is a great way to start building. The Black Edition, means that the cores are unlocked allowing you to tweak the setting to squeeze more juice out of your system by "overclocking" it, I may go over what overclocking is but probably not how to do it since it get very complex and can severely damage your computer. The X4 notes that it has 4 cores that don't exactly translate into more power, but a processor that has 4 cores can run smother that a processor that has 2 cores. Its part of the Phenom series and the 960T is the series number with the model and showing that it has turbo core possible. (Technical specifications that are not relevant if you just want to know what processor I am using)

Now with a processor selected we can move on to researching our next piece of hardware, the backbone of the PC the motherboard.

Wednesday, January 25, 2012

Getting started

Where to begin? I have come to the conclusion that the best place to start is by deciding what type of system do I want? Choosing between putting together a super-powered ultra gaming machine, reliable/reasonable machine that is going to last, or a machine that focus on internet and multimedia makes a huge difference in what components I choose to spend money on and what my expectations are in the end. I should be looking what the end product is and select my parts or upgrades from there. The next step is looking to how much do I want to spend. I'm a student, I cannot afford to spend thousands on a luxury computer all at once. This process is going to take time and my expectations will change as quickly as the technology does.

So moving forward, I have chosen to build a system that is powerful and reliable but gives me the freedom to upgrade as the technology evolves. My budget starting out is $500.00, keeping in mind that this does not include a monitor since I already own one and there are so many options available to use the possibility can range from free (check out craigslist) to thousands of dollars (don't believe me check it out: Sharp Aquos LB-1085 - $135,000.00) so I will probably cover this later but I am not including this in my budget for the machine it self. I know that I can do this and I will show that my $500 will get me in comparison to what popular PC manufactures offer.


Monday, January 23, 2012

PC's much like LEGO

Why is it that huge companies can sell you a PC that they have "manufactured" at ridiculous prices? The majority of people out there don't see that modern PC's are just components assembled together LEGO style. (Seriously a lot of the pieces are just pushed into place, some others are more erector set where you need to screw a few things in) The point is, you do not have to be a technical-genius (although it helps) to build your own PC with less cost and a huge sense of accomplishment. That said what follows will be my personal triumphs, along with pitfalls of how to build, maintain and upgrade a PC. I am not an expert, I don't know everything about PC's but I would like to know more especially about physical computing. I will share with you my experience as I go along and grow much with the technology continually running to keep up.